Week 3
For this week, my main priority was the software side of things. I have a few references which i got inspiration from but some main ones which really helped me with the making of my final design include:
- Neutrino - [DIY] Arduino MP3 player with oled[Soundpod part-1]
- MYTECTUTOR - MP3 PLAYER USING DFPLAYER MINI MODULE WITH ARDUINO.
- learnelectronic - How to Detect Short, Long, and Double Clicks with Arduino
I first started off by testing out of the speakers are working and in a good condition. To do so, since i did not have a multimeter at home, I had no choice but go ahead and actually connect it up with my DFPlayer which is basically a MP3 player board which uses SDcard. The neat thing about the DFPlayer is that it works even without any codes, just power. So, all i had to do was connect it up (just like in Neutrino's video). It took a few tries but I got it to work eventually.
(Sorry for the poor camera work I was alittle bit too excited)
If you're wondering what are the buttons for, on board the DFPlayer you are able to skip songs or control volume. Those buttons are just there to skip the songs i have downloaded on my SD card. Right after that, I started to work on the programming side of things. It wasn't that difficult however the challenging part was to incorperate 2 different codes at once. The codes were already readily available but I just had to combine both of them. The idea was, to have three buttons. The left for volume down and also to play the previous song, the middle one is just to simple play and pause the audio and the right one is for volume up and play the next track. The codes that are available online ony shows how to set up one buttons for each action. I had an idea to include double or long clicks to help change the tracks. That's when i come across learnelectronic's video where he shows how long clicks and double click works alongside his code.
So for the first code like i mentioned previously, is just a simple DFPlayer code which uses the IDE library, SoftwareSerial. The main idea of this code is to just read button clicks and run the function. It is quite lengthy to be placed as images so heres the code instead which i got from mytectutor.com. DFPlayer with Buttons. As for the button press codes, here is the link to the code as well. Detect single, double, and long press.
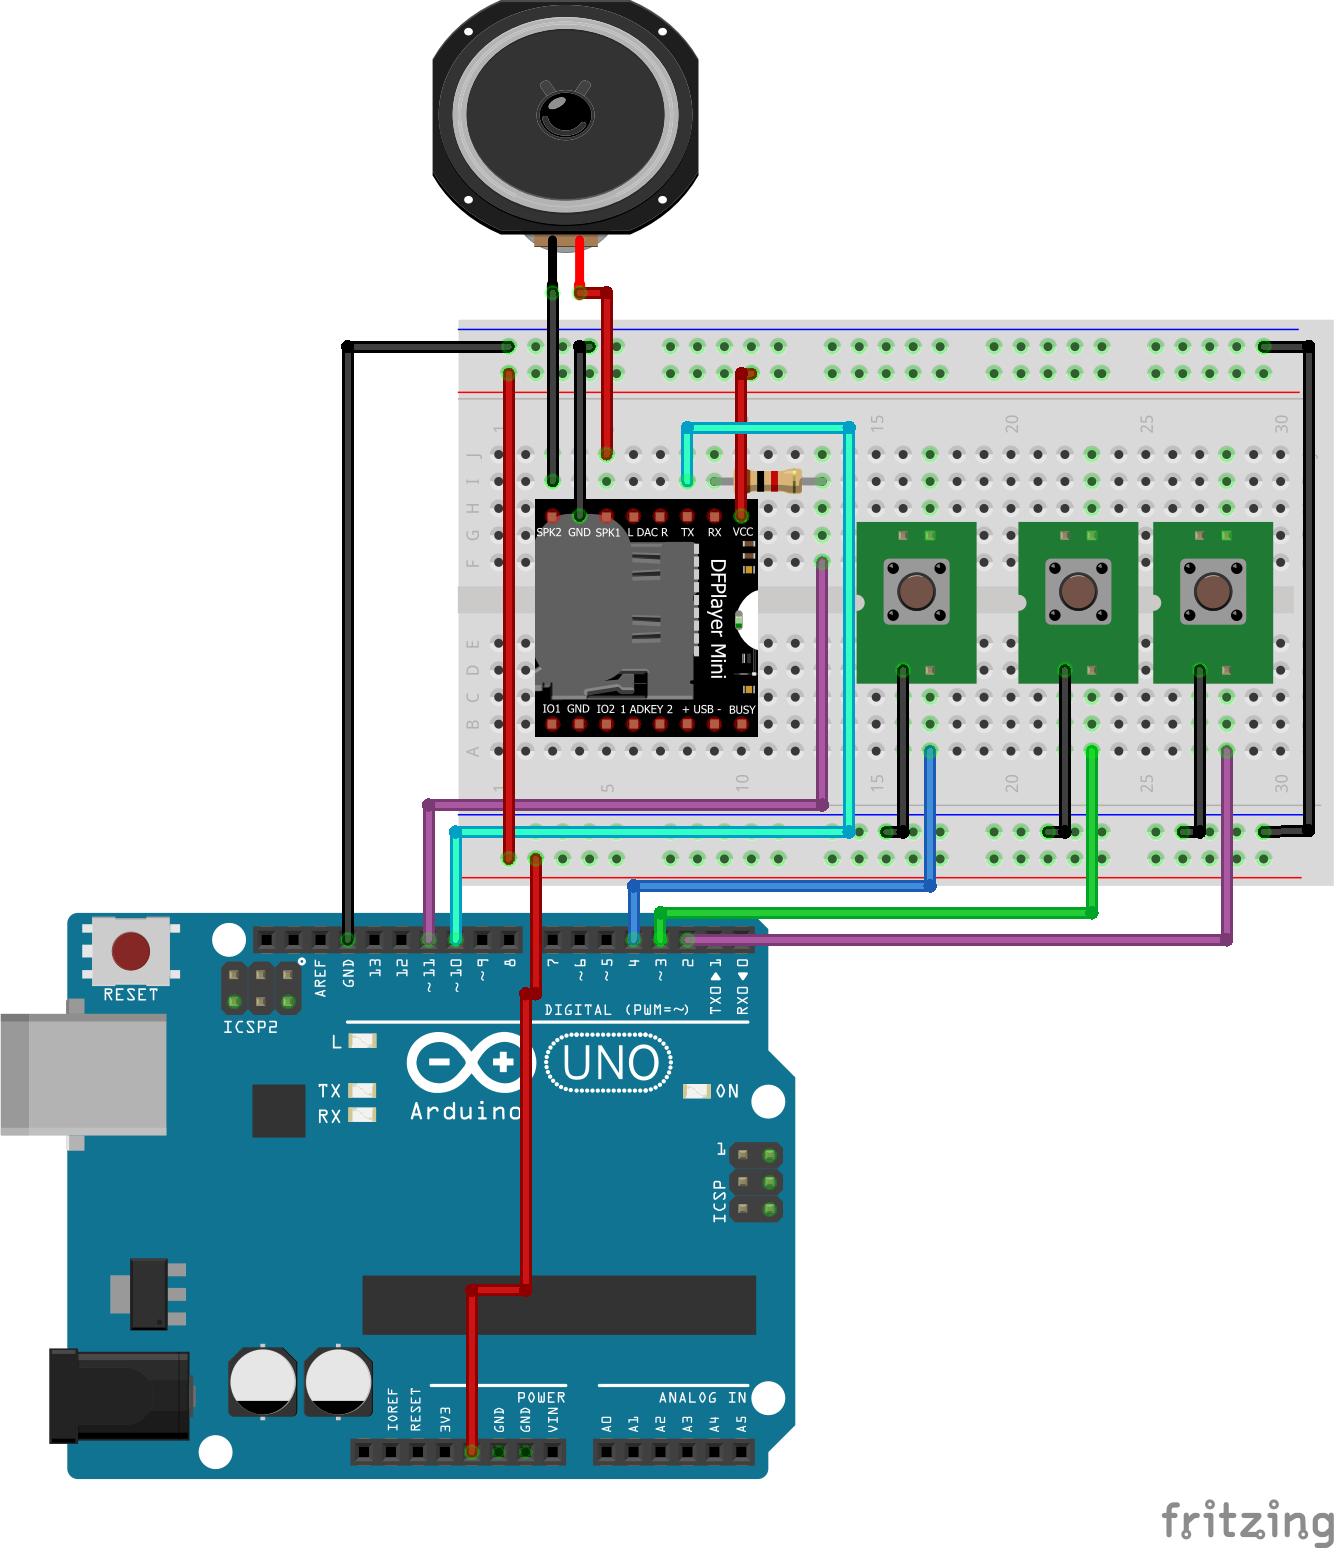
Below shows basically the schematic of what my entire connection is going to look like.
This week i also decided to finally laser cut and 3D print my parts. For the speakers, i first marked out the area where i want to screw and drilled a hole using a power drill. I then went a head and used an M3 screws and hex nuts to secure it in place. As for the 3D printed part of the media control, at first it would not fit the switches in the first try as it was too small by a few inches so i had to sand the sides down so that the buttons would fit in flushed. I then put all the pieces together using tape as i still wasnt confident enough to glue them together, so as to have a rough idea of what it was going to look like. Below shows my base box without the cover and me testing out the button controls. Basically as you can see from the video below, the controls are simple. Press to increase volume up and down and also pause or play the music. Hold volume up to play the next song and Hold volume down to play the previous song
Unfortunately, I've forgotten to take a photo of the inside circuitry of my box but here is the side view of the inside excluding the wiring.If you notice, i also changed to a mini breadboard. I dont really need a big one as i am only using it for my DFPlayer.